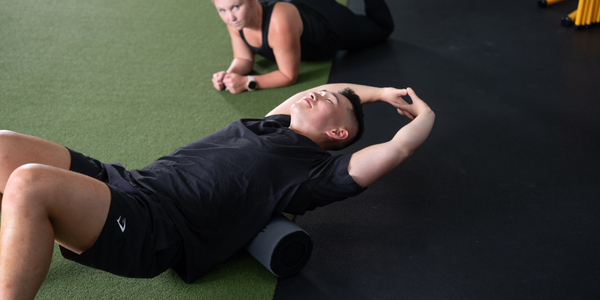
SMART Recovery Foam Roller Basics
What is one piece of equipment with which many have a love/hate relationship? Here are some hints: it is inexpensive, it’s portable, it can be used on any soft part of the body, and it’s highly beneficial for everyone. Drum roll please……the foam roller! Foam Roller Benefits can be felt quickly and are great for everyone.
Foam rollers release tension in muscles and tendons by using personal body weight along the cylinder roller. Technically, known as self-myofascial release. Trigger point therapy and self-massage encourage blood flow and circulation to soft tissues while increasing flexibility and improving range of motion.
A consistent foam-rolling routine can help prevent common exercise-related injuries. Runners may be familiar with the infamous IT band pain. Using a foam roller to massage away facia build-up can help prevent discomfort and keep runners going for miles!
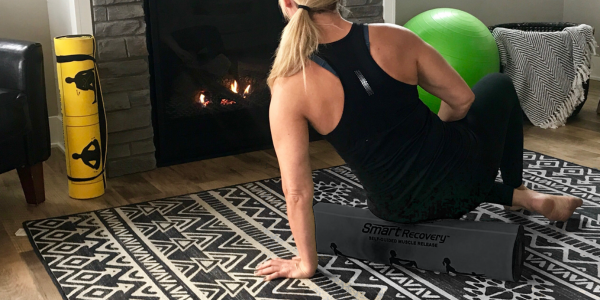
The Smart Recovery Foam Roller features 9 movements that are directly on the foam roller for easy reference. This 2-ft long foam roller is big enough to cover entire muscle groups, but small enough to comfortably fit into your gym duffle bag. The durable polyethylene foam is designed for moderate to heavy use while still holding its shape.
Roll. Rest. Recover. Resume.
We know. You like to push it to the limit at your workouts. We get it. But, remember, everyone needs to give their body and sore muscles a period of time to rest and recover. For many in the fitness world, the routine of rest and recovery now includes a new addition: foam rolling. The use of foam rollers for effectively reducing muscle tension and targeting specific muscle groups is now a widely accepted fitness practice and makes it easier to resume those challenging workouts.
Foam Roller Benefits
Top Benefits of Foam Rolling
- Reduces Muscle Soreness:
- Foam rolling helps increase blood flow to your muscles, which can help reduce soreness after workouts. It’s like giving your muscles a gentle massage that helps them recover faster.
- Improves Flexibility:
- Regular foam rolling can help improve your range of motion. By rolling out tight muscles, you can make it easier to stretch and move more freely.
- Decreases Muscle Tension:
- If your muscles feel tight or knotted, foam rolling can help release those knots. It works by applying pressure to specific areas, which helps relax and lengthen the muscles.
- Enhances Recovery:
- Foam rolling aids in the recovery process by helping to clear out waste products like lactic acid that can build up in your muscles during exercise. This can help you feel less stiff and more ready for your next workout.
- Increases Blood Flow:
- The rolling motion stimulates circulation, which can help deliver more oxygen and nutrients to your muscles. This increased blood flow supports faster healing and overall muscle health.
- Improves Posture:
- By releasing tightness in your back, shoulders, and hips, foam rolling can contribute to better posture. It can help realign your muscles and reduce the strain on your body from poor posture.
- Helps Prevent Injuries:
- Regular foam rolling can help identify and address muscle imbalances and tight spots before they turn into more serious issues. This proactive approach can help prevent injuries.
- Relieves Stress:
- Foam rolling can be a relaxing activity that helps reduce overall stress. The process of rolling out your muscles can have a calming effect and contribute to a sense of well-being.
Use as a Warm-Up or Cool-Down
Foam rollers are used to reduce tension and increase muscle length for either a pre-workout warm-up or post-exercise active recovery.
Foam rolling can provide great benefits before and after a workout. Rolling prior to exercising can decrease muscle density, thus enhancing the warm-up phase; rolling after a workout encourages flexibility and improved recovery.
According to ACE, when using a foam roller during a warm-up, be sure to use it only for a brief period of time to elevate tissue temperature and reduce tension. Applying too much pressure with a foam roller for an extended period could desensitize the muscle and affect its ability to contract during the workout.
Are there Foam Rolling Benefits for Desk Workers?
YES!
Sitting at a desk all day can cause poor posture and decreased blood circulation. A full-body rolling routine is a great tool for tension release and improved posture. This reduces lower back pain and neck pain!
When you first start foam rolling to alleviate pain associated with desk work, spend extra time on your hip flexors and lower back. This is the best way to help you counteract tightness from long hours spent sitting.
5 Common Foam Roller Exercises
1. Iliotibial (IT) Band Exercise
Setup
- Using a Prism Smart Recovery Foam Roller:
- If you’re new to foam rolling, a soft roller might be more comfortable; as you get used to it, you might opt for a firmer one.
- Position Yourself:
- Sit on the floor and place the foam roller under your right hip. Your legs should be extended in front of you. If needed for balance and comfort, your upper (left) leg could be placed on the floor directly in front of you.
Rolling
- Start Position:
- Place your hands behind you for support. Lift your hips off the ground, balancing your weight on the foam roller and your hands.
- Roll Slowly:
- Roll your body slowly from just below your hip to just above your knee. This movement should be slow and controlled, taking about 1-2 minutes to cover the entire length of your IT Band.
- Apply Pressure:
- If you encounter a particularly tender or tight spot, pause and apply gentle pressure on that area for 20-30 seconds. This helps release muscle tightness and improve blood flow.
- Adjust Your Position:
- If needed (such as having a tender spot), you can adjust the position of your legs or shift your body weight slightly to focus on different areas of the IT Band.
- Switch Sides:
- After rolling out the right side, switch to the left side and repeat the process.
2. Adductor Exercise
Setup
- Using Your Smart Foam Roller:
- For beginners, a softer foam roller might be more comfortable, but as you get accustomed to foam rolling, you might prefer a firmer one.
- Position Yourself:
- Start by lying face down on the floor. Place the foam roller horizontally underneath your thighs, close to your groin area.
Rolling
- Position the Foam Roller:
- Place your right thigh on the foam roller, keeping your body in a side-lying position with your right leg extended straight and your left leg bent to support your body.
- Use Your Hands for Support:
- Place your hands on the floor in front of you for balance and support. Your body weight should be distributed between your hands and the foam roller.
- Roll Slowly:
- Gently roll your inner thigh from just below the groin area to just above the knee. Move slowly to target the muscle fibers effectively. Take about 1-2 minutes to cover the length of the adductor muscle.
- Apply Pressure:
- If you find a particularly tender or tight spot, pause and apply gentle pressure to that area for 20-30 seconds. This helps to release muscle knots and improve circulation.
- Adjust Your Position:
- If needed, you can adjust your body position slightly to focus on different areas of the inner thigh. You might also roll from the side of the thigh to the inner thigh to target different parts of the adductors.
- Switch Sides:
- After rolling out the right adductor, switch to the left side and repeat the process.
3. Gluteus Maximus (Glutes) Exercise
Setup
- Using Your Smart Foam Roller:
- If you’re new to foam rolling, a softer roller might be more comfortable; as you get used to it, you might opt for a firmer one.
- Position Yourself:
- Sit on the floor with your knees bent and feet flat on the ground. Place the foam roller underneath your glutes, so it’s positioned just below your hip.
Rolling
- Cross One Leg:
- Cross your right ankle over your left knee, forming a figure-four shape with your legs. This position helps to open up the hip and target the glute muscles more effectively.
- Lean to the Side:
- Lean slightly towards the side of the leg that is crossed (in this case, the right side) to focus the pressure on the glute of the crossed leg.
- Roll Slowly:
- Using your hands for support, lift your hips off the ground slightly and roll your body slowly back and forth over the foam roller. Move from the top of your glute (near the hip) down to just above the sit bone.
- Focus on Tender Spots:
- If you find a particularly tender or tight spot, pause and apply gentle pressure on that area for 20-30 seconds. This can help to release muscle knots and improve blood flow.
- Adjust Your Position:
- You can also slightly adjust your body position by shifting your weight to target different parts of the glute muscle.
- Switch Sides:
- After rolling out the right glute, switch your leg position to the left side and repeat the process.
4. Upper Back Exercise
Setup
- Using Your Smart Foam Roller:
- A smooth roller works well, but if you prefer a deeper massage, you might opt for a roller with ridges.
- Position the Foam Roller:
- Sit on the floor and place the foam roller horizontally behind you. Lean back so that the foam roller is positioned under your upper back, just below your shoulder blades.
Rolling
- Lie Back:
- Gently lie back on the foam roller, supporting your head and neck with your hands behind your head or crossing your arms over your chest.
- Lift Hips:
- Lift your hips off the floor to shift your body weight onto the foam roller. Your feet should be flat on the floor with knees bent.
- Roll Slowly:
- Using your feet to help propel you, slowly roll your upper back back and forth over the foam roller. Move from just below your shoulder blades up to the base of your neck. Aim to roll for about 1-2 minutes.
- Focus on Tender Spots:
- If you find particularly tender or tight tissues in areas, pause and apply gentle pressure by holding that position for 20-30 seconds. This can help release muscle knots and improve blood flow.
- Adjust Position:
- You can slightly adjust your body position by shifting your weight or adjusting the angle of your back to target different areas of the upper back.
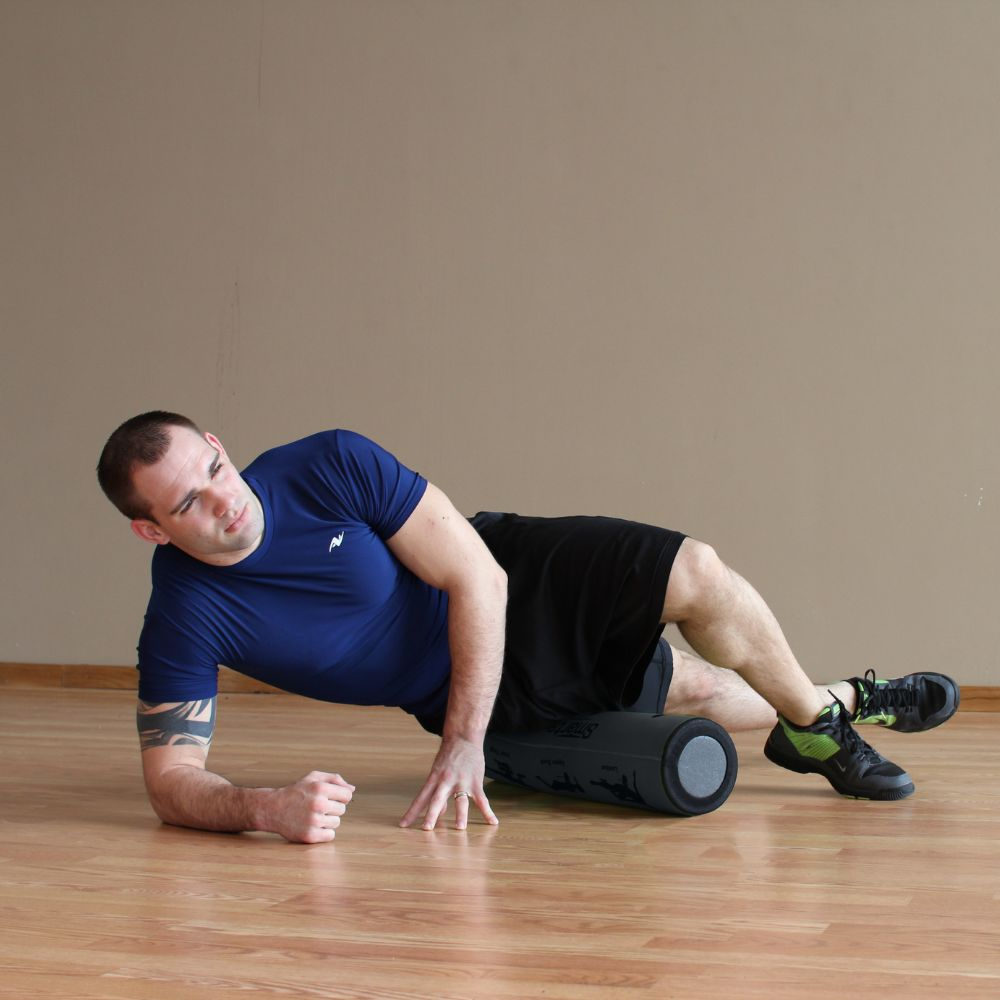
5. Latissimi Dorsi (Lats) Exercise
Setup
- Using Your Smart Foam Roller:
- A smooth or slightly textured roller works well. If you’re looking for a deeper massage, you might opt for a roller with ridges.
- Position the Foam Roller:
- Start by lying on your side with the foam roller positioned under your armpit. Align the roller horizontally, and you should be near the edge of the roller, just below your shoulder.
Rolling
- Lie on Your Side:
- Lie on your side with the foam roller placed under your upper back near your armpit. Extend your bottom arm straight out on the floor for stability.
- Lift Your Hips:
- Lift your hips off the ground slightly so that your body weight is supported by the foam roller and your bottom arm. Place your top arm on the ground for additional balance.
- Roll Slowly:
- Using your legs to help control the movement, slowly roll your body back and forth over the foam roller. Move from the area just below your armpit down to your mid-back. This should cover the entire length of your lats. Roll for about 1-2 minutes on each side.
- Focus on Tender Spots:
- If you find particularly tender or tight spots, pause and apply gentle pressure to those areas for 20-30 seconds. This helps to release muscle knots and improve circulation.
- Adjust Position:
- You can adjust your position slightly to target different parts of the lat muscles. For example, you can move the foam roller slightly up towards your shoulder or down towards your mid-back to address different areas.
- Switch Sides:
- After rolling out the right side, switch to the left side and repeat the process.
The How-to of Foam Rolling
How long to receive foam roller benefits?
The general idea behind foam rolling exercises is that by applying direct loads to your muscles, you lengthen and massage the underlying connective tissue. The first step is to locate an area of tension and then work around the area with deep tissue massage for about 30 seconds. There are different ways to relieve muscle imbalances but in general, use a short slow roll to start, and follow up with longer, slower rolls over the whole length of the target muscle. Don’t be alarmed if your first experience is a little unpleasant…it gets better!
How to foam roll your Back? Quads? IT Band?
In general, foam rollers provide the greatest result when placing the target area, like your quads or IT band directly on top of the foam roller and moving back and forth to apply pressure to the underlying tissues.
When getting started with a fitness program again, you will quickly identify muscles that haven’t been used in a while and need some extra attention when they become sore.
Foam rollers are often used to reduce tension and increase muscle length for either a pre-workout warm-up or post-exercise active recovery. In general, the foam roller provides the most significant result when placing a muscle directly on top of the foam roller and moving back and forth to apply pressure to the underlying tissues.

Here are a few key tips to get the best benefits of foam rolling
- Give yourself time, roll back and forth across painful areas for about a minute, spending extra time on knots and trigger points.
- Move slowly, working from the center of your body towards your extremities.
- Focus on soft tissue and avoid rolling over boney areas of the body.
- Increase the duration as the body adapts to rolling
- Drink plenty of water after each foam-rolling session ensuring your muscles get the hydration they need for recovery
- Deep breathing can help your muscles relax and make the foam rolling process more effective.
Self-Guided Foam Roller: Illustrations make it easier!
At the end of the day, when you’re sore and want relief, the last thing you want to do is try to figure out how to use a foam roller. With our self-guided SMART Recovery Foam Roller, the exercises are printed right on the product, so you’ll never have to spend time worrying about finding a move that works for you.
SMART Recovery Foam Roller from Prism Fitness is used for smart recovery and can release muscle tension before, during, and after workouts. It features nine movements printed directly on the foam roller for easy reference. It is 2 feet long, which is wide enough to use on your back. The durable polyethylene foam is designed for moderate to heavy use while still holding its shape.
If you have specific issues or need personalized advice, a fitness professional or physical therapist can provide tailored guidance to ensure you’re using proper technique and addressing your individual needs. You may also need to seek professional medical advice to ensure proper healing.